Step-by-Step Instructions
- 01: How to Build a Raised Garden Bed with Trex Decking →
Chapter 01: How to Build a Raised Garden Bed with Trex Decking
Print Instructions
Step 1: Cut side pieces of the garden box
Cut four (4) Trex boards at a 45-degree angle to be 5' long from tip to tip. These will create the two long sides of the garden box.
Next, cut four (4) Trex boards at a 45-degree angle to be 3' long from tip to tip. These will create the two short sides of the garden box. The 45-degree angle will allow you to hide the exposed ends of the boards.

Pro Tip
If cutting boards at a 45-degree angle is beyond your comfort level, cut the longer pieces to 5' and the shorter pieces to 2'10" using a straight angle.
Note: with this method, the longer pieces will overhang the shorter pieces, and the cut end of the longer pieces will be visible.
Step 2: Cut deck boards for the interior of the garden box
First, cut 12 short pieces of the decking to 11" long. These pieces will be mounted inside the garden box, and the side pieces cut in Step 1 will attach to them.
Step 3: Build the corners
Attach two of the 11" pieces together to form a corner with the 2" composite deck screws that are color matched to your decking. Repeat this process to form 4 corners.
Pro Tip
Predrill with an 1/8" drill bit before creating the corner to avoid any splitting caused by drilling this close to the edge of the board.
Step 4: Attach the long side boards
Stand the corner pieces on a flat surface. Place the first long 5' piece against the corner piece with the short point of the 45-degree angle at the edge of the corner piece where the two 11" pieces meet together. Fasten the 5' piece to the corner piece with two 2" color-matched composite deck screws. Repeat this process on the other end of the 5' piece.
Place the second 5' piece on top of the sides you attached in Step 4 and fasten to the corner pieces with two 2" color-matched screws. Repeat this process on the other side to create two 5' long sides.
Step 5: Attach the short side boards
Place the first 3' piece against the corner pieces attached to the longer pieces. Fasten two 2" color-matched fasteners through the 3' piece and into the corner piece. Repeat this process on both ends and for the top 3' long piece. Repeat this process on the other end.
Step 6: Add supports for your raised garden bed
Place two 11" pieces equal distance apart and fasten them to the 5' long pieces with two fasteners per 5' board. Repeat this process on both sides. These supports will brace the long pieces so they don't push out.
Step 7: Create top surface
Pro Tip
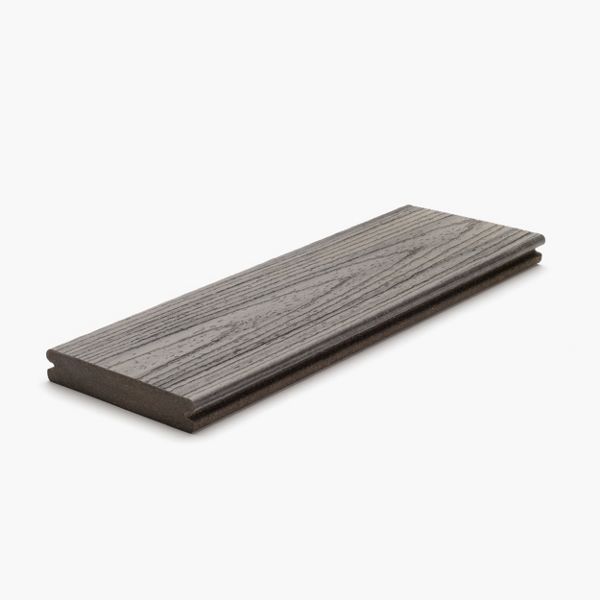
If you are purchasing materials for to create your raised garden beds as opposed to using scraps from a previous project, opt for Trex Transcend® Lineage® deck boards for the top surface of your garden bed to create a cooler surface when gardening these beds.*
Cut your top pieces to the desired length for the overhang you would like.
Pro Tip
We recommend installing the top pieces centered on top of the two upright pieces for a clean look.
Cut the two longer sides to 5'3 ½" to the long point of a 45-degree angle.
Cut the two shorter pieces to 3'3 ½" to the long point of a 45-degree angle.
Fasten these pieces through the top into the side of the upright boards. Fasten every 16" with the 2" color-matched composite deck screws.
Pro Tip
Pre-drill the holes to avoid splitting the board while fastening into the side of the upright board.
Step 8: Add the final touches
Place the raised garden bed where you intend to keep it. Then, line the box with a weed mat material on the bottom and the interior sides of the garden bed. Finally, fill the Trex raised garden bed with soil — and let the gardening begin!
Tips for Your New Raised Garden Bed
Now that you know how to build a raised garden bed, it's important to understand how to get the most out of this latest addition to your landscaping. Follow these tips to help your plants thrive and improve the longevity of your raised garden bed:
- Make sure your raised garden bed has proper drainage to avoid oversaturating your plants, damaging your boards, or creating mold inside your garden.
- Depending on the climate in your area, consider covering your raised beds during the winter months to reduce the impact of snow and ice on your decking boards.
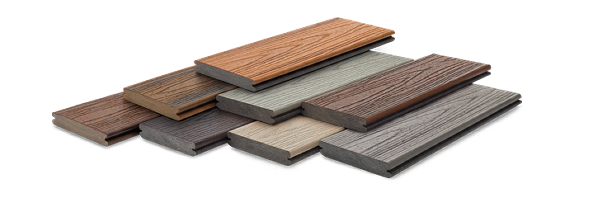
- Place your raised garden bed in a location where it will add to the visual appeal of your landscaping. Consider the color of your decking boards and how they best complement your garden.
Build Your Next Garden Project With Trex
Composite decking material has a wide range of uses that go beyond just building a quality deck. By partnering with a trusted provider, you can get the best value out of your boards and improve the quality of your projects.
If you're looking for inspiration on what to do with your leftover Trex boards, check out our blog for more ideas and how-tos. Or, find a dealer to get your hands on the Trex materials you need for your next big outdoor undertaking.


*Although Trex Transcend Lineage® is designed to be cooler than most other composite decking products of a similar color, on a hot sunny day, it will get hot. On hot days, care should be taken to avoid extended contact between exposed skin and the deck surface, especially with young children and those with special needs.
This content was partially or fully generated by AI and has been reviewed by our team to ensure accuracy and relevance.
(NOT ALL PRODUCTS ARE AVAILABLE IN EVERY COUNTRY.)
Copyright © 2026 Trex Company, Inc. All rights reserved.
Photos and videos © 2026 Warner Bros. Discovery, Inc. or its subsidiaries and affiliates. All trademarks are the property of their respective owners. All rights reserved.
- Country
-
Australia
-
Austria
-
Bahrain
-
Brazil
-
Canada English
-
-
Chile
-
Colombia
-
Costa Rica
-
Cyprus
-
Czech Republic
-
Fiji
-
France
-
Germany
-
India
-
Ireland
-
Israel
-
Kuwait
-
Lithuania
-
Mexico
-
Netherlands
-
New Zealand
-
Norway
-
Oman
-
Qatar
-
Saudi Arabia
-
South Africa
-
Spain
-
Sweden
-
Switzerland
-
Turkey
-
United Arab Emirates
-
United Kingdom
-
United States
-
Venezuela
By choosing your country, you acknowledge that you have read Trex's Privacy Policy